I had the pleasure of spending five days this last week in a workshop with the amazing Esterita Austin. Esterita teaches a technique of composing a self-portrait quilt made of hand-dyed fabric that is fused to a background. The style is very Impressionistic and abstract. This is such an amazing process, I want to share it with you.
First of all, I have to say that it is a little disconcerting working on a project featuring your own face. Esterita strongly encouraged each of us to work with a photo of our own face because there is an element of self-discovery in the process. So first, the photo. I spent a morning with my friend Darcie, a very accomplished photographer, to get a photo with the correct balance of shadow and light. This is the photo I chose to work with.
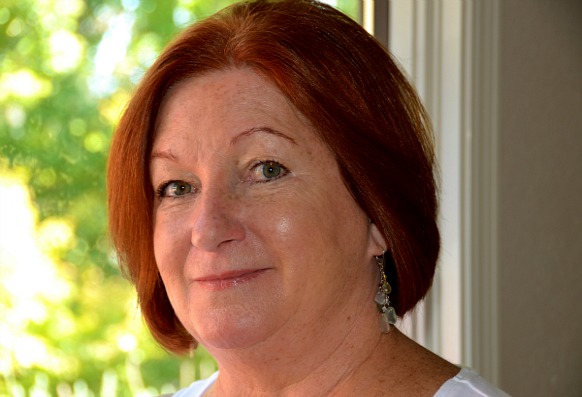
I took the required 11 x 18 copy to the class with me and was promptly told that it needed to be closer. Yikes! So, I dutifully trekked to the local FedEx Office store and cropped the photo and blew it up again.
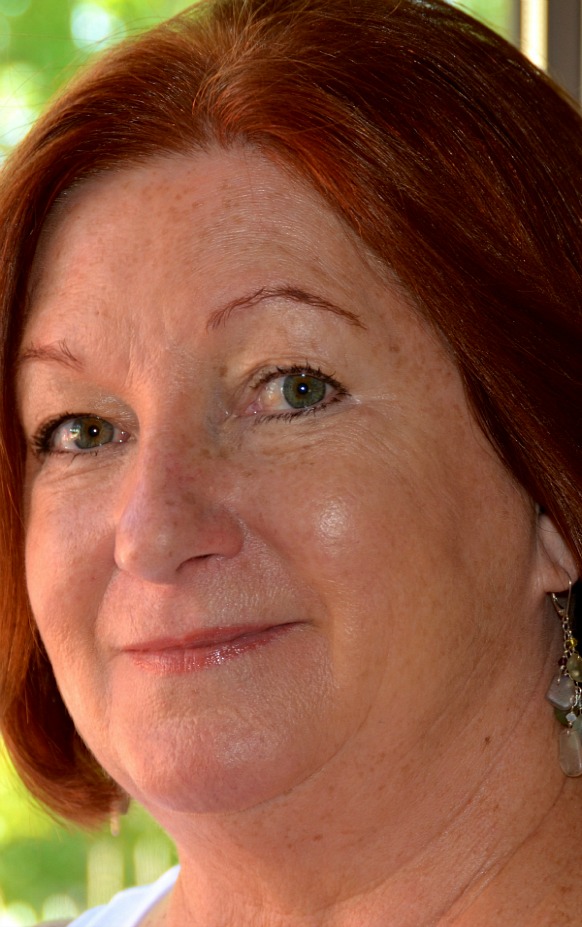
Wow. This may be way too much self-awareness. Every wrinkle, every pore, every freckle maximized! The photo was approved for use and it was time to get started. The first morning was spent with Esterita telling us about her art background and showing us classical paintings that effectively demonstrated the use of light and shadow. She then showed us several examples of portraiture done using her technique, including one her daughter did.
I was particularly fascinated with the eyes in all of these quilts. They are very luminous and realistic. Then, it was time to start to work on our own portraits.
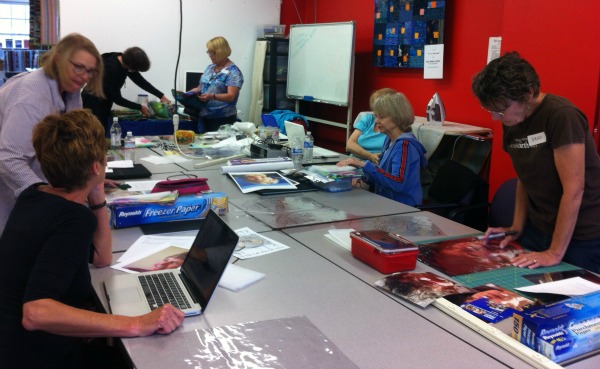
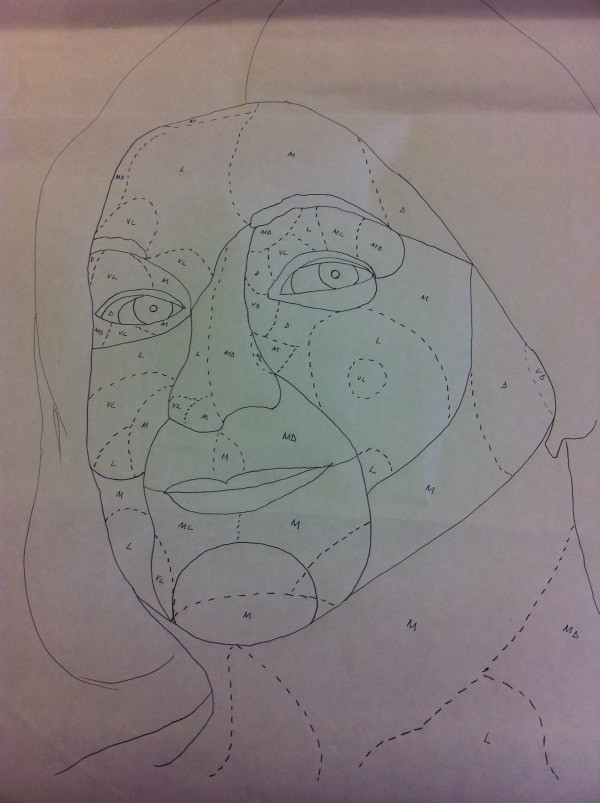
We were all a little terrorized. Look how neat that table is. It didn’t look like that for long! We were given a piece of clear acetate and a piece of Doodle transfer paper. We laid out a piece of solid black cotton fabric, placed the transfer paper on it, laid the photo on top of the transfer paper, placed the plastic over the photo and used a black Sharpie marker to outline our face. We then laid white freezer paper over the plastic and transferred our drawing onto the freezer paper. We then looked at our photo and separated the areas of our face into light, medium and dark areas.
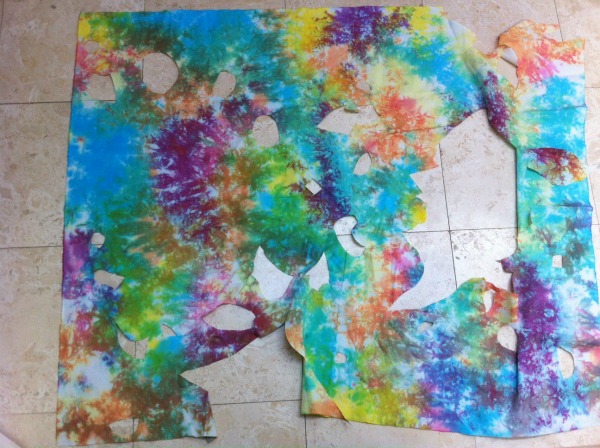
This got scarier by the minute. We were then given one yard of hand-dyed, multi-colored fabric. This was the only fabric we were allowed to use on our faces. This is what was left of mine when I finished my face.
Then, looking at the photo and the areas of shadow on our face, we used the fabric to interpret the light, medium and dark areas of the face.
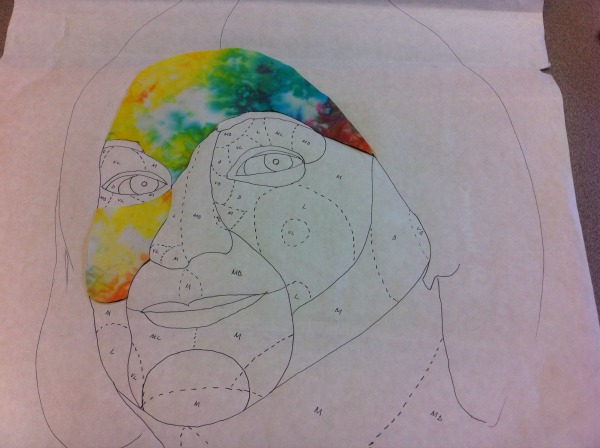
At this point in the process, there was a lot of hysterical laughter and jokes about leprosy and jaundice, for the obvious reasons. We continued working on our faces for the next two days. It took a lot of time to find the correct spot on the fabric that would translate to the right shadows and lights.
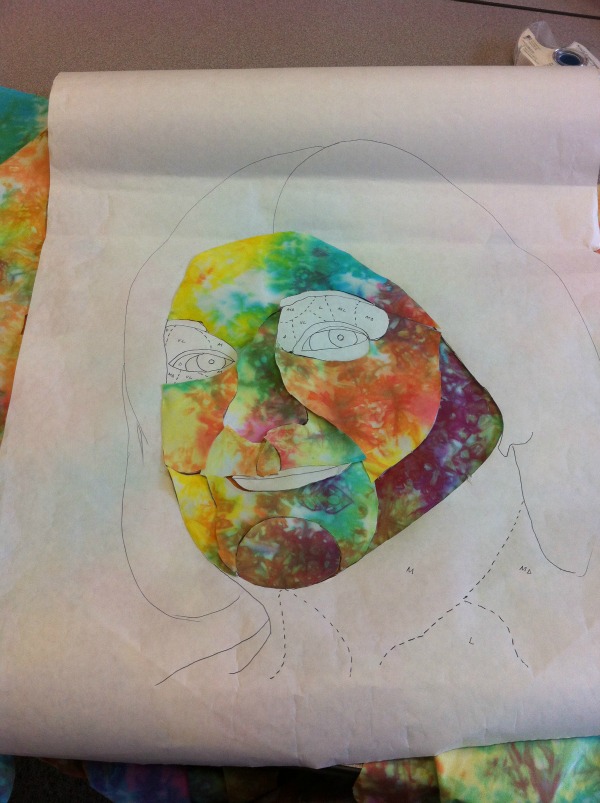
Yes, I laughed, too. But remember this is Impressionism and it is supposed to be abstract! When all the fabric was in place on the face, we then took small amounts of acrylic paint and highlighted the darks and lights which helped tone down the intensity of the color in the fabric.
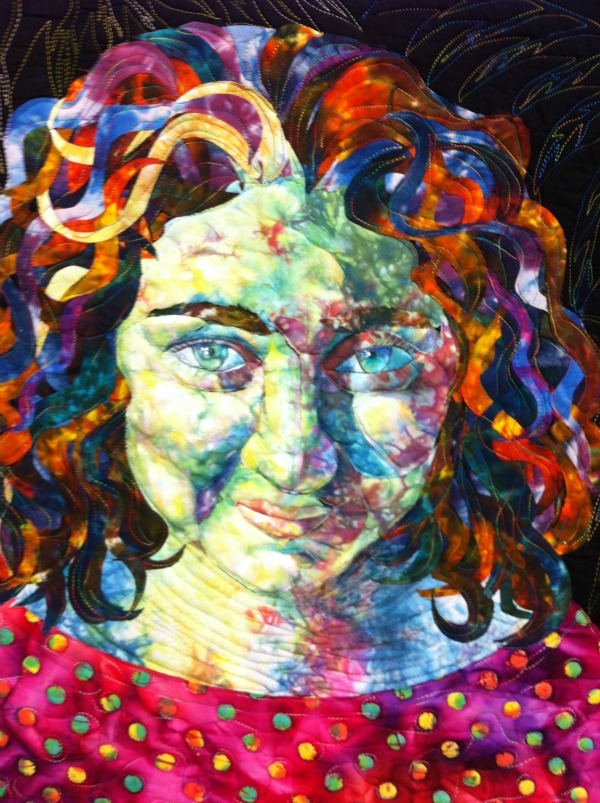
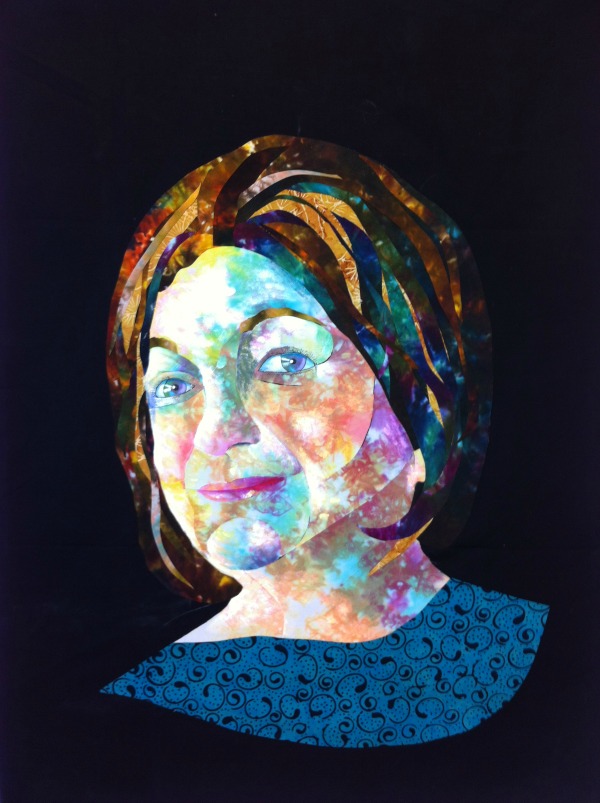
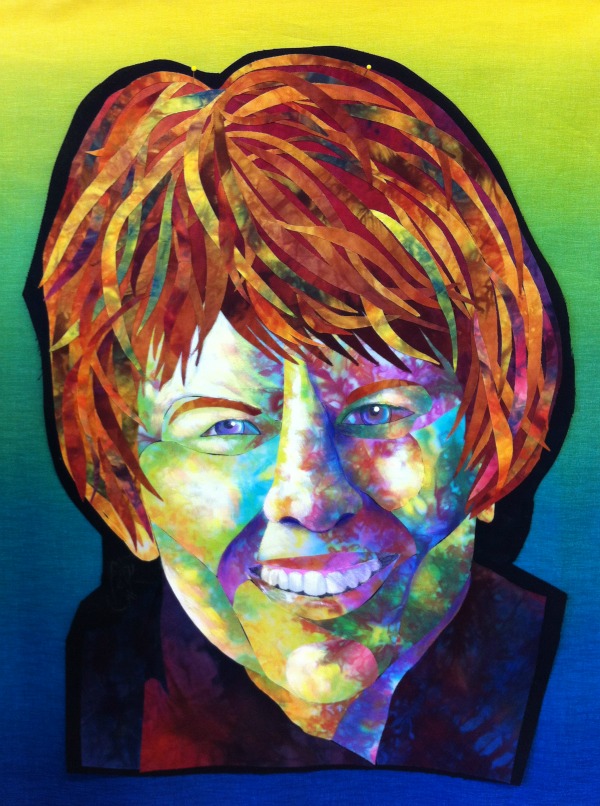
To make a long story short, this is my finished portrait. I didn’t have time to finish my hair and I don’t think I like the print in the dress, so I will be doing some editing at home.
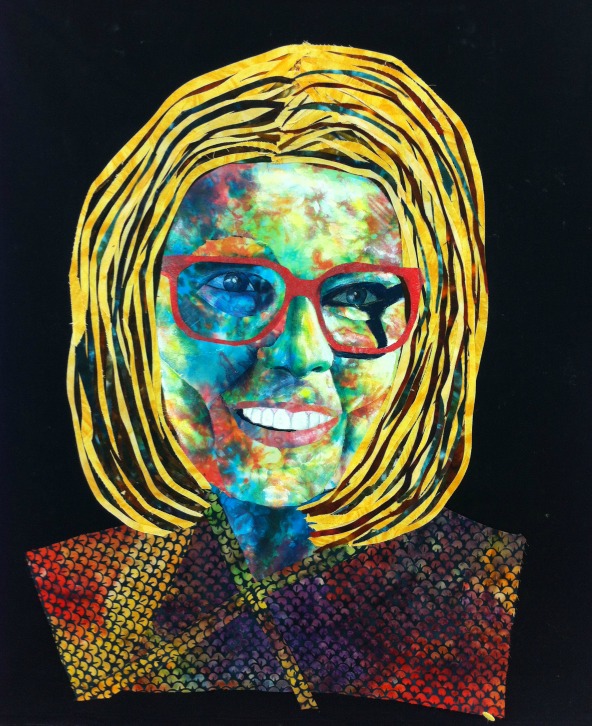
Here are the portraits of the others.
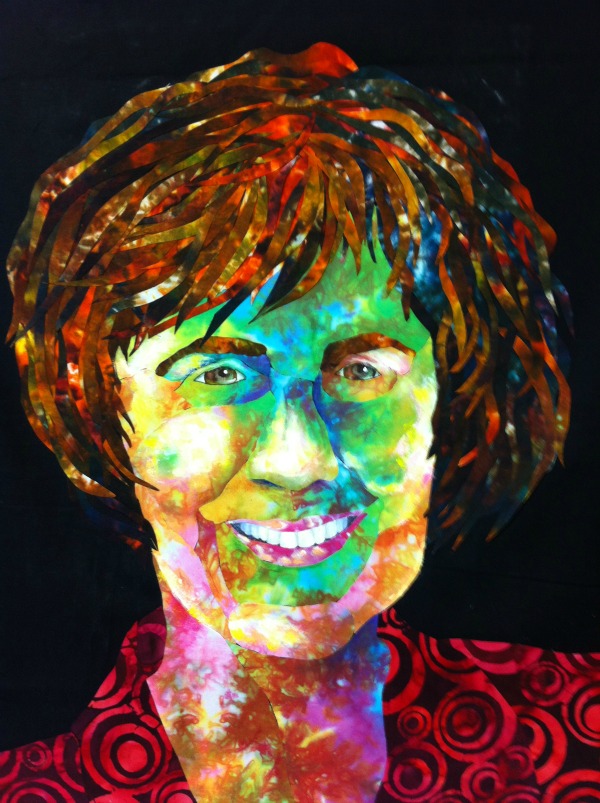
PAT
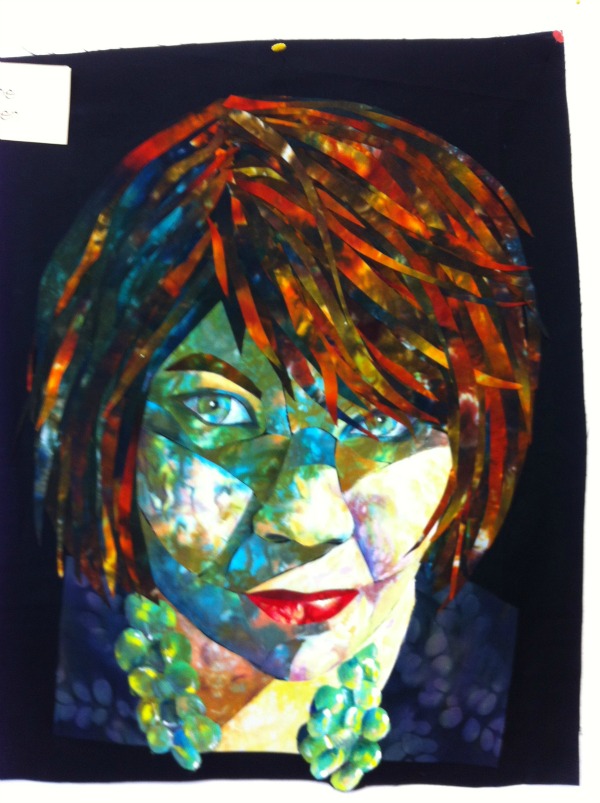
RACHEL
LYNN

GAYE
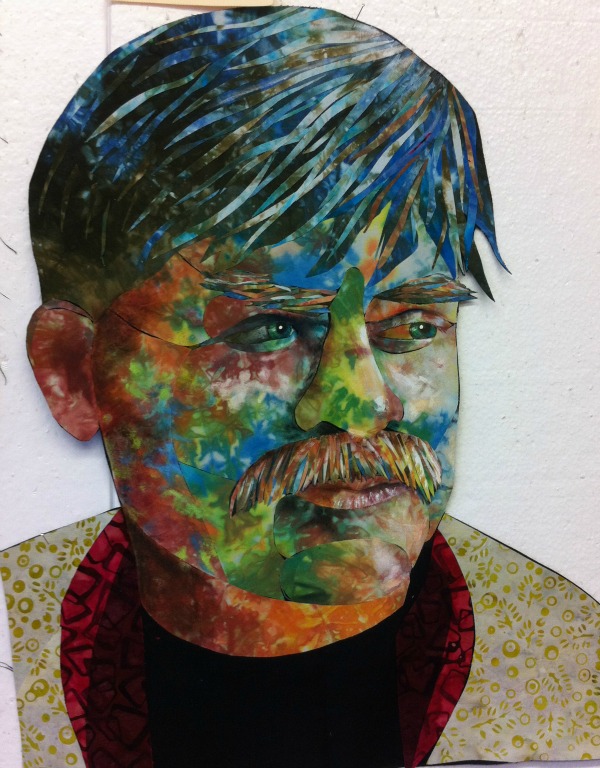
CHERYL’S HUSBAND
JOANN
What is really remarkable is how much these portraits truly reflect the person and their individual personality. Esterita Austin teaches all over the United States and does two retreats a year, one in Hawaii and one in Italy. If you ever get the chance to take her portrait class, I can highly recommend you try it.
Until next time,
Joan
Wow. Those portraits are truly stunning. You are right about the eyes. Thanks for posting about the class.
I am so impressed. I love the results and I think I’ll look into her workshop.
Don’t ask me to explain, but I almost cried when I saw the finished portraits. You are truly beautiful, and I love how you explained the design process. The other women (and man) are all equally wonderful. Thank you so much for sharing. I love the post.
Joan,
These are all lovely! I love the eyes, they are the mesmerizing!
Elizabeth
Thank you for your lovely comments!
These are fabulous! I play with fabric but am not a quilter. How do you work the hair? Is fabric cut into strips then layered from dark to light? Attaching “hair” seems like a nightmare so how do you start? Thanks for your reply.
Yes, the hair is layered. You have to decide where the light source is coming from and then put the “dark” layers of “hair” on one side, and the highlighted “light” hair on the side where your light source is coming from. It is fun to move these strips of fabric around to find the perfect “light”.